GUIDE TO CUPPING COFFEE

Coffee cupping is a method professionals and enthusiasts use to evaluate and analyze the characteristics of different coffee beans. Cupping sessions are typically conducted in a controlled environment, following a specific protocol to ensure consistency. This protocol gives the opportunity for the taster to assess the aroma, taste, body, and overall quality of the coffee.  

In the following, we give you our guide to a step-by-step coffee cupping process. The following coffee cupping process is for 150 ml cups, you can always adjust the amounts according to the cup size you want to use: 

Before you start a cupping, there are some materials you need: 

  • Coffee (20 grams of each coffee, 4 or 5 different types is a good start) 
  • Coffee grinder 
  • 0.1 g precision scale 
  • Timer 
  • A cupping bowl or cup for each coffee (measuring capacity should be 150ml-200ml) 
  • Cupping spoons or soup spoons  
  • Hot water, electric kettle 
  • Mug or glass (to hold cupping spoons) 
  • Rinser –  a glass or cup with hot water 
  • Sometimes you need a bowl to spit the coffee out 
rene-porter-aKWmuOqWAwI-unsplash

When you start evaluating the different coffees, you should do that in the “blind”. Anything you know about coffee and your previous experience will influence your perception of the coffee. One way to do that is to give each coffee a number (sample codes). Avoid putting any kind of bean or coffee bags on the table, because it can influence the judgment of the coffee you are about to experience. 
Before the cupping session, evaluate the roast of the coffee beans visually to identify any inconsistencies or defects. Some physical inconsistencies or defects could be insect damage, mold, inconsistent roast, or broken beans. Defective beans can affect the flavor and aroma of the coffee.  

 
  • Grind 8.5g batches of the selected coffees: Before grinding each batch, run a little bit of the coffee through it, to remove any old stray grounds from the last coffee that was used in it. The coffee beans should be ground coarsely, similar to the consistency of coarse salt or coarse sand, to allow for optimal extraction during cupping. Place each batch in separate cups, and give them sample codes, so they can be identified. 
 
  • Smelling the dry ground coffee, “The fragrance”: Open your mouth, and inhale. Take note of the aroma released by the freshly ground coffee. This step helps identify any unique scents before brewing. Write whatever you sense or think.  
 
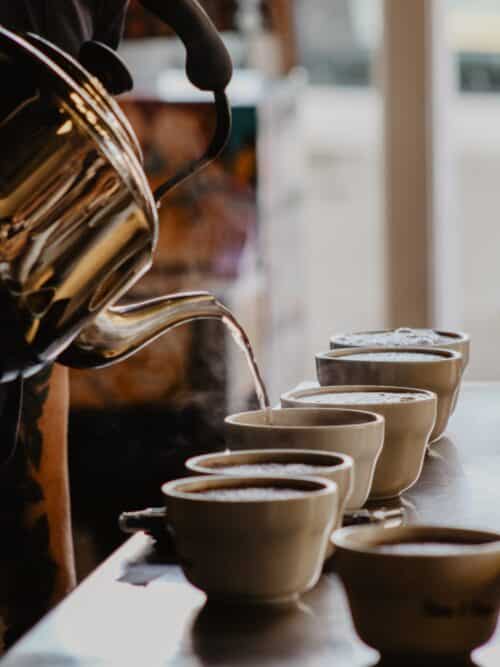
  • Wetting the grounds: Add 150 ml hot water (91°-95°C/195°-205°F) to the 8.5 g of coffee. The water-to-coffee ratio is typically 16:1 (water to coffee). Once the water is added, then smell each coffee sample again.  
 

If you want to check how much water each cup holds, then place the cup on the scale (without the coffee) and fill the water to check how much it holds    
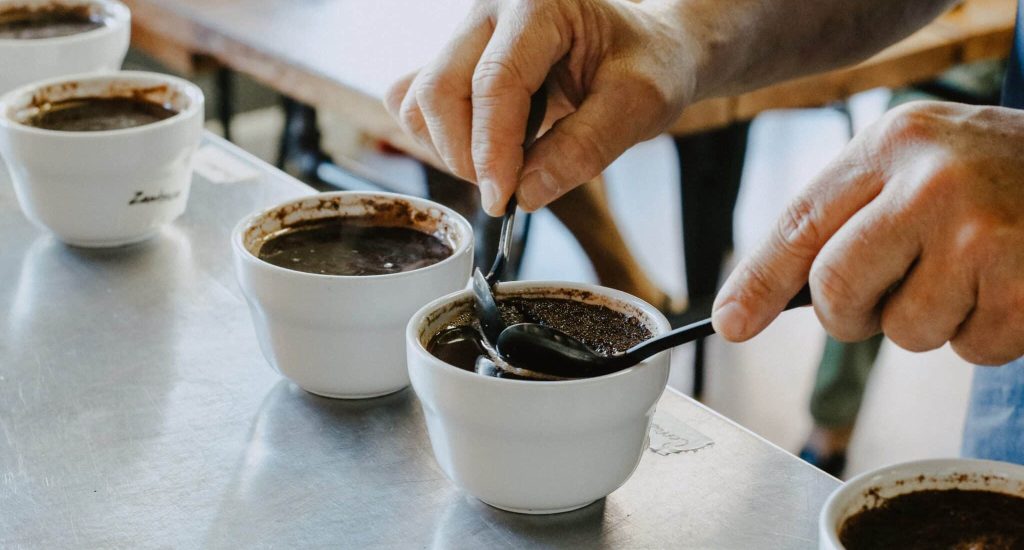
  • Breaking the crust: After allowing the coffee to steep for about 3 to 4 minutes, use a cupping spoon to break the crust that forms on the surface. Put your nose down to the cup, push the spoon through the top layer and stir 3 times from top to bottom and inhale deeply to assess the aroma.
 
  • Scoring aroma: Evaluate and score the aroma characteristics of each coffee cup. Note any fragrance notes, intensity, and complexity.
 
  • Removing the remaining grounds: Skim off any remaining grounds floating on the surface of the cups.
 
  • Tasting the coffee: Before tasting the coffee, wait for the coffee to cool down to around 71°C/160°F. It takes about 14-16 minutes from the time when the water was poured. That is the first tasting, the “aspiration”. Use a cupping spoon to slurp a small amount of coffee from each cup. The slurping helps distribute the coffee evenly across the palate and enhances the tasting experience. The coffee is still pretty hot, so there are a lot of flavors and notes you can’t experience yet.  You can call the first tasting, “a introduction to the coffee”. The second tasting is around 49°C/120°F, and now you can experience a lot of new different flavors and notes. In the tastings, take note of the coffee’s flavor, acidity, body, sweetness, and aftertaste. Offen you have a third tasting, that is more like a check up, on the notes, that you already found. Remember to cleanse the spoon and your mouth with water between each tasting to avoid cross-contamination of flavors. Score each coffee based on its taste attributes and overall quality. This step often involves rating the coffee on a scale and providing comments on specific characteristics.
 
  • Comparative analysis: Compare the different cups of coffee, noting the similarities, differences, and preferences. This step helps to understand the flavor profiles and quality variations among the samples. The analysis must be overall score based on the three rounds of tastings.  
rene-porter-7RYrEvbqFM8-unsplash

Coffee cupping allows you to objectively evaluate various coffees and make informed decisions regarding sourcing, blending, and quality control

Luk